
Adding filters to a trigger
Filters let you narrow down when a trigger fires. For example, only for orders above a certain value, only for customers in a specific country, or only for products with a given tag. Without a filter, an automation runs for every matching event on its entity, which is sometimes exactly what you want and sometimes far too noisy.
A filter is a set of conditions joined by AND/OR logic, and you can nest conditions into groups for combinations like "financial status is paid AND (country is Canada OR country is United States)". Each condition targets one field on the entity, and the operators and value input adjust to that field's type. A currency field offers "is greater than" and a money input, an enum field like financial status offers "is"/"is not" and a dropdown of its possible values, and so on.
Building a filter
Open the automation's detail page and select the edit icon next to Filter. This opens the filter page, where a live preview on the right shows how many existing records match your conditions as you build them, so you can sanity check a filter before relying on it for real events.
The filter panel on the left has four tabs: Builder, Presets, Saved, and Advanced.
Builder
The Builder starts empty with a placeholder condition. Select Select field to open a searchable list of every field available on the entity, each with a short description so you don't have to guess what it means.
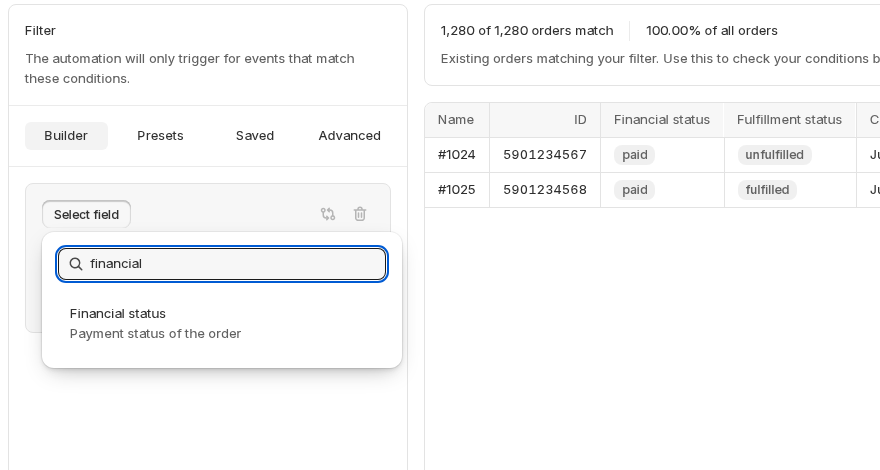
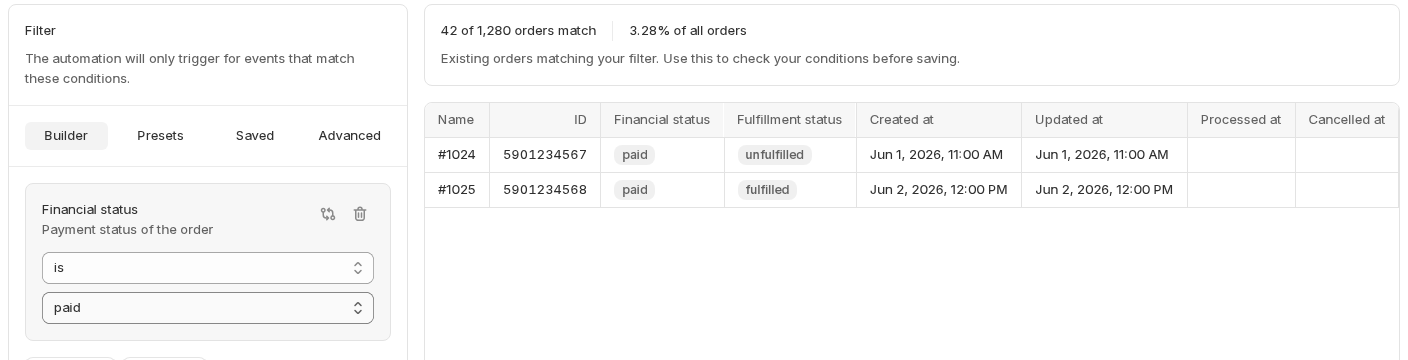
Once you pick a field, its condition card appears with an operator and a value input shaped to that field's type, an enum field gets a dropdown of its possible values, for example. As soon as the condition is complete, the preview on the right updates to show how many records match it:
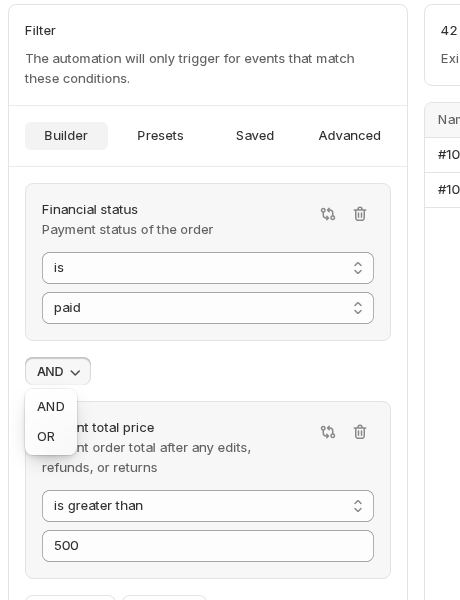
Select Add criteria to add another condition to the same group, or Add group to start a nested group with its own AND/OR logic. Wherever two conditions or groups sit side by side, a small AND/OR toggle lets you switch how they combine:
Presets and Saved
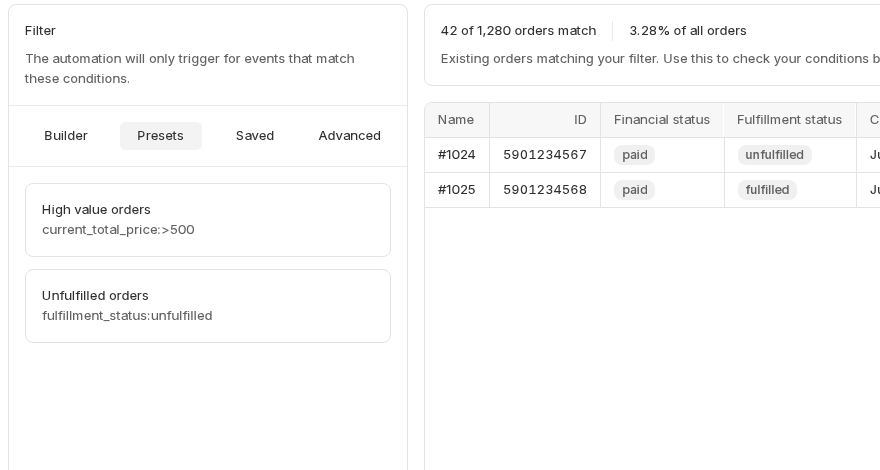
Rather than building a filter from scratch, the Presets tab offers ready-made filters for the entity, and the Saved tab lists any filters you've saved before (with an option to delete ones you no longer need). Selecting one loads it straight into the builder, ready to tweak further if needed:
Advanced
If you'd rather write the filter directly, the Advanced tab exposes the compiled query as plain text, in Shopify's own search syntax, along with a badge showing whether it's currently applied and a link to the syntax reference:
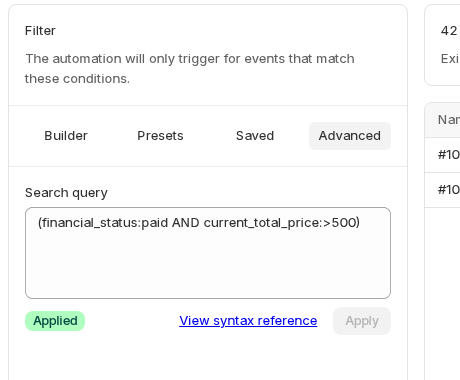
Filters compile down to Shopify's own search query syntax, the same query language used in the search bars throughout the Shopify admin. If you ever want to see exactly how a filter is represented (for instance in an automation's activity log, when a filter changes), take a look at Shopify's search syntax documentation.
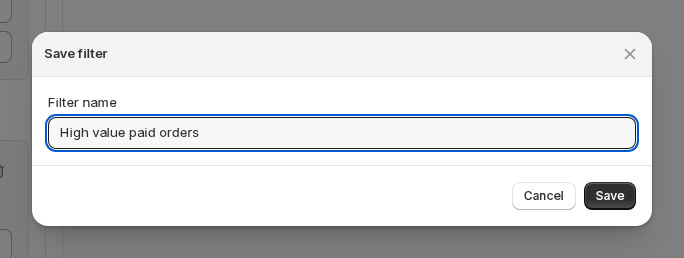
Save vs. Apply
The page header has two distinct actions, and it's worth knowing which one does what:
- Save filter stores the current conditions under a name so you can reuse them on other automations later. It shows up afterwards in the Saved tab, but it doesn't change what this automation actually does.
- Apply filter is what makes the trigger start using these conditions. It updates the automation right away, future events are checked against the filter from that point on; events that already fired aren't affected.
You can do either, both, or neither, save a filter for later without applying it here, apply one without saving it, or save and apply at the same time.
Editing or removing a filter
Open the automation's detail page and select the edit icon next to Filter to change or clear its conditions, then select Apply filter to commit the change. Updates apply right away to future events; they won't affect events that already fired.